Introduction
If you have old tapes, cassettes, or camcorder tapes lying around, they are not just plastic reels, they are time-emotional capsules. With the time and technique we can convert these tapes into MP4, MAV and MP3 formats Therefore, digitizing tapes is a smart step to make your memories safe, shareable and future-proof.
Digitize is simple, converting your analog tapes into digital files (MP4, MP3, MAV etc). That can be saved in computer, phone or cloud storage. In this article we will learn how we can digitize our tapes to digital files.
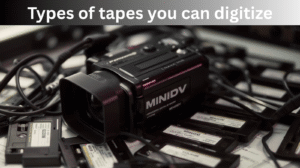
Types of tapes you can digitize
First, it is important to understand which tapes we can digitize:
- VHS (Video home system): Old home videos and movies.
- MiniDV, Hi8, Digital8: Popular format of camcorder.
- Audio cassettes: For music and personal recordings.
- Betamax Software: 80s premium format.
- Reel tapes: For vintage audio enthusiasts.
Every format requires a different setup, but the tools are the same. Playback device, capture tool and computer.
What you need before starting
Digitization requires a few basic things. Here is a list:
-
Playback device
You have a working VCR, cassette player, or a camcorder that has a tape. If you do not have one, you can buy it from the local market.
-
Capture device
This is the gadget that converts analog signals into digital ones. Example:
- USB video capture card
- Audi interface (if digitalizing only audio)
- FireWire cable (for MiniDV cameras)
-
Computer or Laptop
On which software is installed and storage is available.
Recommended specs:
- Minimum 8GB RAM
- 100GB free space
- USB ports available
-
Software
You need a program for recording or editing.
Popular software:
- OBS studio
- VLC media player
- iMovie or Window Movie Maker
- Audacity (for audio tapes)
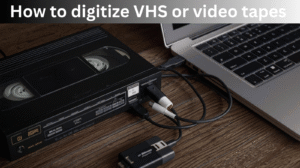
How to digitize VHS or video tapes
Connect your devices
- Connect VCR to capture cards using RCA cables.
- Insert capture card into USB port.
- Ensure video is being detected in the software.
Open your capture software
- Open OBS studio and Roxio software.
- Select the video capture device and choose input source.
Play and record
- Insert the tape and press play.
- Start record in the software.
- Recording is real-time, so the more tapes are played, the more time it will take.
Stop and save
- When tape runs out, stop recording.
- Save file in MP4 or MOV format.
Edit and Enhance video
This is optional but very useful. You can cut unuseful parts of the video, fix the brightness of the video , or add subtitles to your video. Here are some tools:
- Deviance resolve
- Shotcut
- iMovie
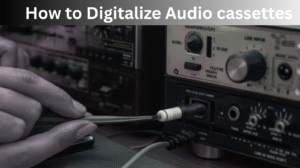
How to Digitalize Audio cassettes
Old audio cassettes can also be digitalized:
Connect cassette player
- Connect the headphone cable of the cassette deck to the Line-In port of the computer.
- If it is not there, then use a USB audio capture device.
Open audacity
- Audacity is free and light weight software.
- Select input source (Line-In or Microphone).
Start Recording
- Press play button on cassette player.
- Press the record button in Audacity.
Trim and clean audio
- Use the “Noise Reduction” effect to remove background noise.
- Normalize volume and export file in MP4 or MOV format.
Save and Backup your digitalized files
The most important step after digitalizing is safe storage.
-
Local backup
Keep a copy on your computer or external hard drive,
-
Cloud backup
Upload to Google drive, Dropbox, or One drive. So that data is never lost.
-
USB Drives and DVDs
If you want to share with your family members then a USB flash drive is the best option.
Tips for best quality conversion
- Always clean your tapes before playback.
- Avoid pausing during capture. Use trimming later.
- Record in the highest quality setting if possible.
- Convert files into MP4 or MOV formats.
- Use noise filters or color correction tools.
Professional services vs Do it yourself
When it comes to digitalizing tapes, you have two main options. DIY (Do it Yourself) or Professional services.
If you want a cheap process of digitalizing then , DIY (Do it yourself) is the best option. This process is budget-friendly and provides a learning experience. But it can take some time and technical set up.
On the other hand, Professional digitalizing services give you high quality results and effortless process. You just provide tapes and experts convert them to high-resolution digital format. But they are expensive,
If you have a large number of tapes then Professional is the best option but if you have only 1 or 2 tapes then DIY method is budget-friendly and perfect choice.
Common problems and solutions
Some problems may arise in the process of digitalizing but their solutions are simple.
If you are not getting a video signal then, first check the cable connections and input source. If audio is not syncing with video you can manually sync it in editing software. Sometimes volume is low, then fix it by increasing the gain within software. If tape is stuck do not force it to eject it. Instead use a rewinding tool to avoid damaging the tape. And if file size seems too large, then compress the file using free software like Handbrake without losing much quality.
Converting Digitalized files for mobiles and YouTube
Once your video is digitalized, it is easy to make it mobile friendly.
Use Handbrake software and export:
- Format: MP4
- File quality: It should be 720p or 1080p
- File size: 4 to 6 MPs
You can upload them to YouTube or Google photos as a memory for a long time.
Future-proofing your memories
Digitalizing tapes is not just a one-time process. It is a digital preservation habit too. You can use these files in future:
- You can use it in family documentaries.
- You can share it on social media.
- You can also get remastered using AI tools.
Update your backup copies every 3-5 years to maintain compatibility with new formats.
Also Read
Vanilla Gift Card 16 Digits Code
Does A Venmo Asked For Last 4 Digits Of Phone Number
Trusted Digital Remittance Companies
My opinion
Old tapes are not just plastic reels, they are emotional time capsules. By digitalizing them you give them a new life. Whether it is your parents’ wedding video, or childhood voice messages. It is possible to enjoy and preserve them in digital format.